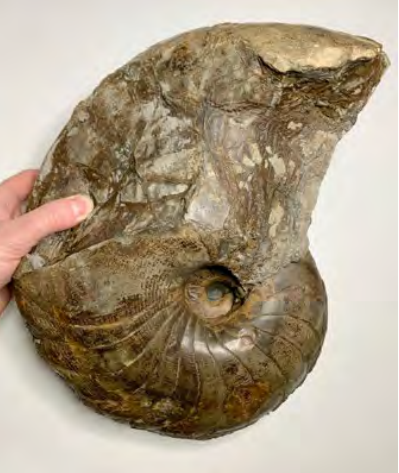
Figure 1: The spectacular Rutland ichthyosaur – the largest and most complete ichthyosaur ever discovered in the UK. It was a find like this by Joseph and Mary Anning in the early 1800s that helped lead Mary Anning to a life dedicated to the discovery, preparation, study and commercialisation of fossils which now adorn the walls of museums around the world. Dean Lomax for scale sporting his Mary Anning Rocks T-shirt! Mathew Power Photography
“Gone Fossil Hunting…”
An introduction to safely looking for and preparing fossils.
In the first article in this series, I highlighted the staggering breadth of utility that fossils have, from academic research to applied industrial analysis, value in commercial trade and preservation in public and private collections. In all instances the fossils must be found, collected and prepared – but the end purpose and legal constraints will ultimately drive where, and how, specimens are acquired and what happens to them afterwards.
Sometimes fossils are found through serendipity – someone just happens to be in the right place at the right time and spots something unusual that captures the eye. Some exceptional fossils have been found this way, including the recent discovery of the Rutland ichthyosaur by Joe Davis of the Leicestershire and Rutland Wildlife Trust. This specimen (Figure 1) is the largest and most complete ichthyosaur specimen ever discovered in the UK! Importantly, Joe and his colleagues recognised the significance of the find, reported the discovery, and a group of expert palaeontologists were brought in to help carefully plan, and execute the excavation in partnership with Anglian Water, Rutland County Council and the Leicestershire and Rutland Wildlife Trust.
A Moment for Mindfulness?
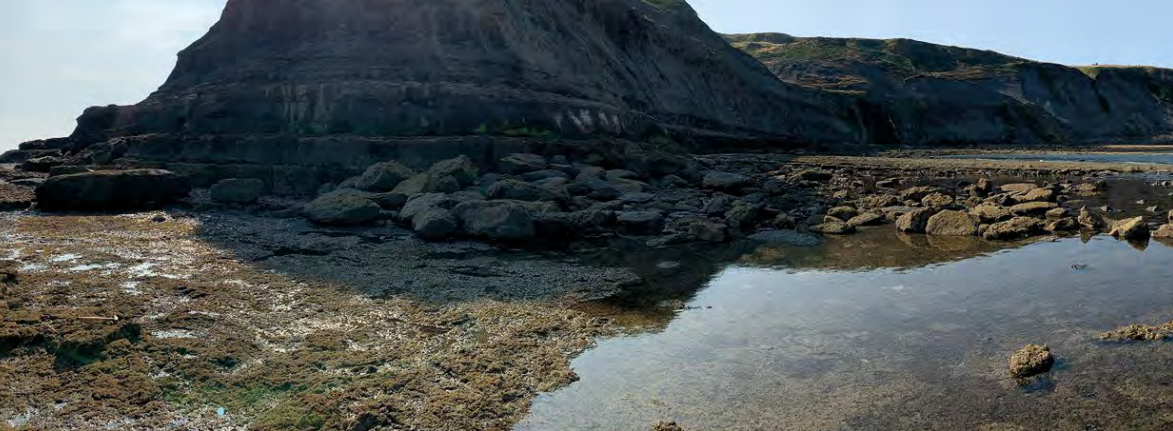
More often than not fossils are found by people that are actively looking for them. There’s something exhilarating about hunting for, and finding, fossils – being the first person on Earth to discover a specimen and expose it to the light in what may be the first time for tens or even hundreds of millions of years. If you are really lucky you may even find something new to science that no one has ever seen before. Fossil hunting can be very therapeutic – an opportunity to focus on something other than the constant demand of the digital age, get some fresh air and enjoy the great outdoors (Figure 2).
Getting Started
To get started it’s important to consider what you are targeting to collect, and for what purpose. These questions will probably govern most of the preparation that’s necessary. For example, if you are doing a detailed biostratigraphic analysis of cuttings or core from a wellbore, you may be visiting a core shed that requires advance permissions, training, facilities bookings, payment, transport and accommodation, and materials for documenting observations and to collect samples for processing microfossils. On the other hand, if you are looking for Jurassic ammonites, you may just be driving down to the coast for a walk along the beach with a rucksack. If you have an interest in a specific group of fossils, do some research first to find where best to start exploring if you don’t already know where to go. There’s a wealth of information available online through social media, or connect with your local professional or amateur societies, many of which provide access to organised excursions. In the UK a great place to start is the UKAFH (UK Association of Fossil Hunters) that has a great website highlighting some key localities with information on the geology, likely find frequency and logistical considerations for site access.
Know Your Rights
Wherever you are planning to collect fossils it is important to know your rights and what is permissible by law.
In most cases freedom to collect depends on who owns the land or mineral rights and their rules for collecting. Some localities have no constraints at all; some are governed by a general code of practice; some require a licence to be obtained that may require payment of a fee. At some public, state or federal locations collecting may be prohibited by law for conservation purposes.
There can be a lot of nuances, and collecting guidelines can get pretty complicated. For example, constraints may be tied to specific types of fossils (common fossils may be freely collected, but scientifically important specimens need to be declared). It is also common to be allowed to collect from loose material, but not specimens that are in situ without prior approval from a governing body. This prevents over-collection and needless damage to exposures that subsequently remain for others to enjoy.
It is impossible to cover the full range of legal considerations and jurisdictions here, but you should understand your rights, and certainly seek the necessary permissions or licences before you head out. There may be regulation over the disposal of specimens that have been collected (for example, if you plan to sell fossils, important finds may first need to be offered to domestic museums).
There are also some restrictions on the commercial sale or export of material that is of scientific or cultural significance. This is the case with some fossils from China, Mongolia and Russia.
Be Safe!
Fossils can be found in mountains, deserts, swamps, rivers, beaches, cliffs, road-cuttings, quarries, mines, offshore or anywhere else sedimentary rocks are being weathered, eroded, or mechanically exposed. So, whether you are collecting samples for a PhD thesis in micropalaeontology, megalodon teeth for commercial sale or trilobites for a private collection, chances are you’re going to find yourself somewhere exciting… and potentially dangerous.
One of the most important things to do before you go fossil hunting is to perform a risk assessment. Where are you planning to go? How are you planning to collect (are you picking up loose fossils, hammering, sieving, using heavy duty kit like rock saws)? What are the potential hazards? What PPE (Personal Protective Equipment) do you need? What is your communications plan? What is your contingency if things go wrong? What emergency services are available? Where is the nearest hospital? Be prepared and don’t be complacent. Always let someone know where you are going.
This may sound like overkill, but the great outdoors can be dangerous. Slips, trips and falls are the most common risks, and having slipped and badly dislocated one of my fingers while out collecting one day I know how fast a fun afternoon can deteriorate. For this minor injury it took support from the coast guard, the fire brigade and the nearest hospital (over an hour’s drive away) to reset my finger.
Collecting
Collecting fossils can be exhilarating fun and academically rewarding. Remember that fossils provide the basis for our understanding of the age of rocks and provide a lot of palaeoenvironmental information. You should always record where you found a fossil as accurately as possible, both the physical location, and, if possible, what stratigraphic unit it was collected from. You never know – you may have just picked up something that no one has found from that location before, or it could be something completely new to science! The value of a fossil is significantly enhanced by good information on where it came from.
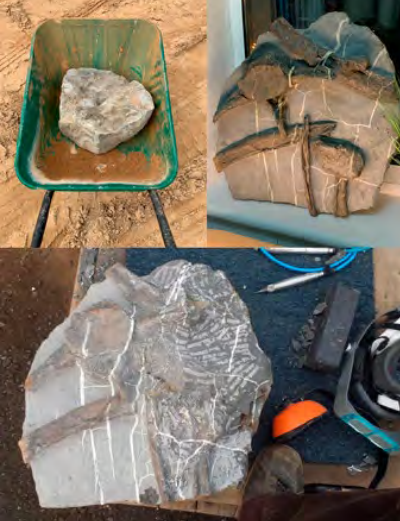
The Best Specimens May Be Hard to Spot!
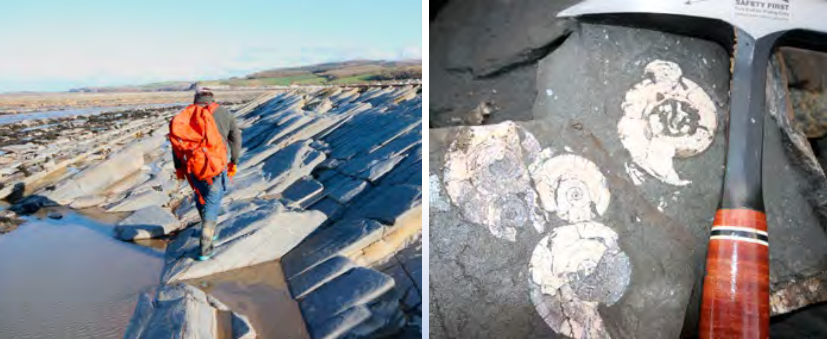
Tap into local knowledge wherever possible. You may need to sieve sand to find sharks’ teeth, split shale slabs to find fish, crack nodules for ammonites, or look for hints of fossils on the edges of rocks that can only be effectively prepared by experienced professionals using percussion and air-abrasion tools (Figure 5). It takes a trained eye to spot a good crab nodule, or a block containing an assemblage of bones. Reserve use of your hammer for collecting samples, splitting nodules or trimming down the rock on large finds so they can be carried home (think about how you may want the composition or display for the piece before you inadvertently remove a natural stand). Indiscriminate hammering rarely generates good material. If you find something spectacular (like Joe Davis did) and you are not sure what to do, contact a local regulatory body or museum to report the find before trying to collect it.
Preparation and Conservation
The style of preparation and preservation required for each fossil depends on the nature of the specimen and the sedimentary rock in which it is encased. Most professional level preparation requires advanced equipment, experience and a lot of patience. You can either pay a highly skilled preparator to prep a specimen for you, or you can buy the equipment needed and learn how to do this yourself. Most kit needs to be operated by an adult, or at least under adult supervision. There are lots of safety considerations in fossil preparation, especially with the use of air compressors, pneumatic tools, acids, solvents, abrasive powders and so on, and dust extraction, eye, ear, skin and breathing protective equipment are essential. Some fossils can only be safely prepared in professional laboratories – this is particularly the case with palynomorph maceral preparation that may require use of extremely dangerous chemicals like hydrofluoric acid to remove silicate material.